
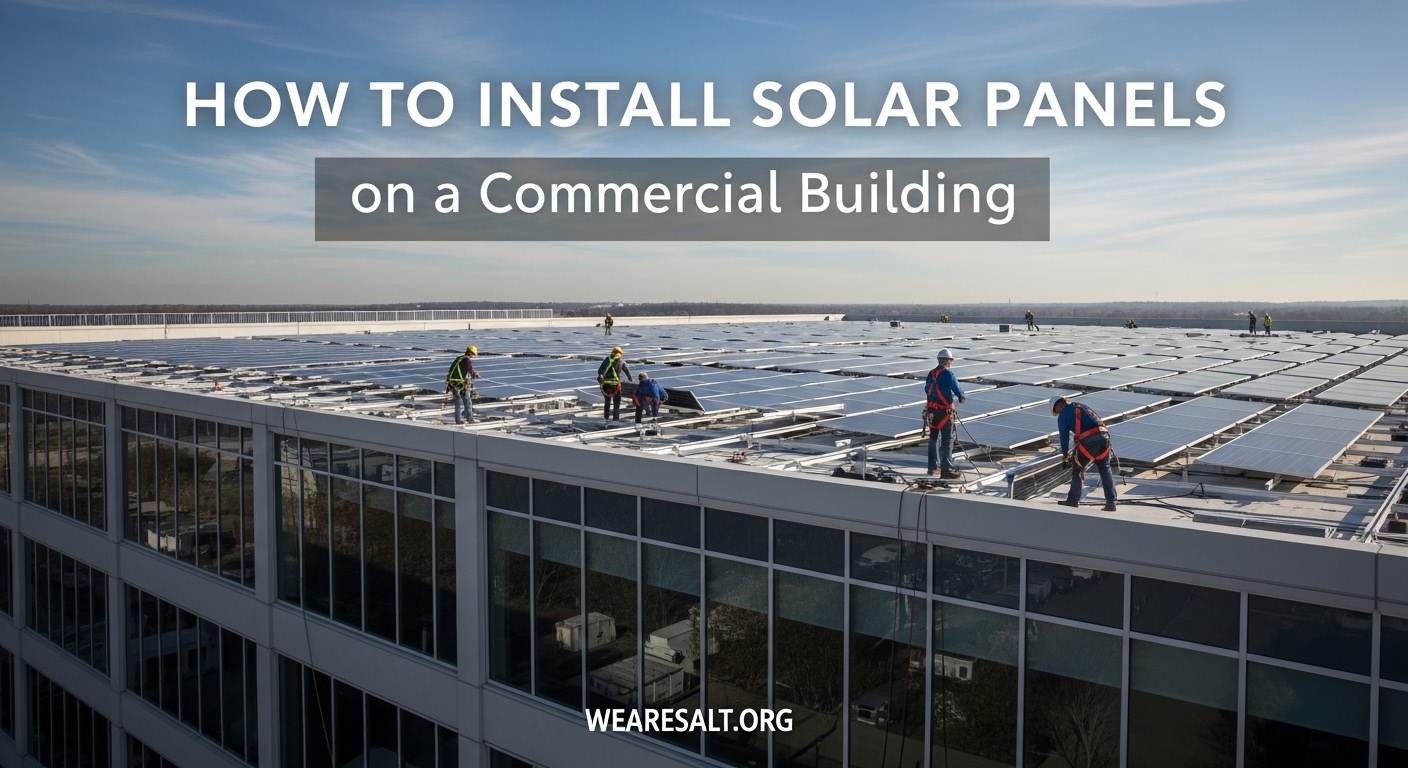
Installing solar panels on a commercial building is one of the smartest investments a business can make in 2026. I have guided dozens of companies through this process over the past decade. The transformation from energy-dependent operations to self-sustaining power generation delivers measurable financial and environmental returns.
Can you put solar panels on a commercial building? Absolutely. Most commercial properties with adequate roof space or available land can support solar installations. The key is understanding the full process from initial assessment through system activation.
In this comprehensive guide, I will walk you through exactly how to install solar panels on a commercial building. You will learn the assessment phase, design considerations, financing options, permitting requirements, installation steps, and what to expect after your system goes live.
Table of Contents
How to Assess Your Commercial Building for Solar Installation
Before you spend a dollar on equipment or sign any contracts, you need a thorough feasibility assessment. I have seen businesses skip this phase and face costly surprises mid-project. The assessment phase typically takes 2-4 weeks and addresses five critical areas.
Roof Condition and Structural Analysis
Your roof must handle significant additional weight. A typical commercial solar installation adds 3-6 pounds per square foot for ballasted systems. Penetrating mounting systems distribute weight differently but require structural integrity at attachment points.
What is the 33% rule in solar panels? This guideline states that your solar array capacity should not exceed 33% of your building’s total electrical service capacity. Exceeding this ratio can trigger additional utility requirements and equipment upgrades.
Engage a structural engineer to evaluate load-bearing capacity. They will assess roof age, material condition, and underlying support structures. Many commercial roofs need repairs or reinforcement before solar installation.
I always recommend addressing any roof issues before installing panels. Removing and reinstalling solar equipment for roof repairs costs significantly more than doing it right the first time. Most quality solar installers include preliminary structural assessment in their initial site evaluation.
Electrical Infrastructure Evaluation
Your building’s electrical system must accommodate solar generation. An electrical engineer will evaluate your main service panel, transformer capacity, and distribution infrastructure. Some older commercial buildings require electrical upgrades to handle solar interconnection.
Review 12-24 months of electricity bills to establish your baseline consumption patterns. Commercial solar design depends heavily on understanding peak demand periods, seasonal variations, and usage trends. This data drives system sizing and financial projections.
Shading and Site Analysis
Solar panels need direct sunlight to perform optimally. Conduct a shading analysis using specialized software that models sun patterns throughout the year. Nearby buildings, trees, HVAC equipment, and architectural features can all create problematic shade.
South-facing roofs typically deliver the best results in the Northern Hemisphere. East and west orientations can work well but produce different generation patterns throughout the day. Flat commercial roofs offer flexibility with tilted racking systems that optimize panel angles.
Rooftop vs Ground-Mount: Which Is Right for Your Property?
Most commercial solar installations use rooftop mounting, but ground-mounted systems offer compelling advantages for businesses with available land.
| Factor | Rooftop Solar | Ground-Mount Solar |
|---|---|---|
| Space Requirements | Uses existing roof area | Requires 5-10 acres per MW |
| Installation Cost | 10-20% lower | Higher due to foundation work |
| Maintenance Access | Requires roof access protocols | Ground-level access, easier cleaning |
| System Expansion | Limited by roof size | Highly expandable |
| Best For | Urban locations, limited land | Rural properties, large energy needs |
Ground-mounted systems allow optimal tilt and orientation regardless of building architecture. They also simplify maintenance and cleaning access. However, they require additional permitting for land use and may face local zoning restrictions.
Pre-Installation Assessment Checklist
Use this checklist to evaluate your commercial property’s solar readiness:
- Roof age under 15 years or recently replaced
- Structural engineer confirms load capacity adequate
- Electrical service panel has available breaker space
- Shading analysis shows minimal obstructions
- 12+ months of electricity bills available for analysis
- Property ownership or long-term lease secured
- No roof warranty restrictions on solar attachments
- Local zoning allows solar installations
- Utility company offers net metering or similar programs
How to Design Your Commercial Solar Panel System
Once your assessment confirms feasibility, the design phase translates your energy needs into a technical specification. I work with businesses to balance optimal performance against budget constraints and space limitations.
System Sizing Based on Energy Goals
Determine what percentage of your electricity consumption you want solar to offset. Most commercial installations target 70-100% offset, though some businesses size systems specifically to manage peak demand charges.
Consider future growth when sizing your system. If you plan facility expansion or electrification of vehicle fleets, design for expansion capacity now. Adding panels to an existing system later costs more than building scalability into the initial design.
Panel Selection for Commercial Applications
Commercial installations typically use high-efficiency monocrystalline panels. These deliver more watts per square foot, maximizing energy production from limited roof space. Panel efficiency ratings between 19-22% are standard for commercial projects.
Consider panel durability ratings and warranty terms. Commercial panels should carry 25-year performance warranties guaranteeing at least 85% output at warranty end. Look for IEC 61215 and IEC 61730 certifications indicating rigorous testing for environmental conditions.
Inverter Technology Options
String inverters, power optimizers, and microinverters each suit different commercial scenarios. String inverters work well for uniform rooftops without shading issues. Power optimizers and microinverters maximize production from complex roof layouts or partial shading conditions.
Commercial systems over 100kW often use string inverters for cost efficiency. These central inverters handle multiple panel strings and simplify maintenance. Expect inverter replacement once during the system’s 25-30 year lifespan.
Mounting System Selection
Two primary mounting methods exist for commercial rooftop installations. Ballasted racking systems use concrete blocks or heavy materials to hold panels in place without penetrating the roof membrane. Penetrating mounts attach directly to structural members with weather-sealed flashing.
Ballasted systems preserve roof warranties and work well on flat commercial roofs. However, they add significant weight and may require structural reinforcement. Penetrating mounts reduce weight loads but create waterproofing concerns requiring professional installation and warranty coordination.
Solar carports offer another mounting option for commercial properties with parking areas. These structures generate electricity while providing covered parking. Carport installations typically cost 20-30% more than rooftop but deliver dual functionality.
How to Finance Commercial Solar Panel Installation
Understanding your financing options determines whether solar delivers the financial returns you expect. I have helped businesses evaluate these options across dozens of projects with varying ownership structures and financial priorities.
| Financing Option | Upfront Cost | Ownership | Tax Benefits | Best For |
|---|---|---|---|---|
| Direct Purchase | 100% of system cost | You own system | Full ITC and depreciation | Businesses with capital, seeking maximum ROI |
| Solar Loan | 0-20% down payment | You own system | Full tax benefits | Businesses wanting ownership without large upfront cost |
| Power Purchase Agreement | $0 | Provider owns system | None to host | Businesses prioritizing immediate savings, no maintenance |
| Solar Lease | $0-$1,000 | Leasing company owns | None to host | Businesses wanting predictable payments, limited risk |
| PACE Financing | $0 | You own system | Full tax benefits | Property owners, long-term building holders |
Direct Purchase: Maximum Long-Term Returns
Buying your solar system outright delivers the highest lifetime savings. You capture all electricity savings, tax credits, and depreciation benefits. Payback periods typically range from 4-7 years depending on local electricity rates and available incentives.
Commercial solar systems qualify for the Investment Tax Credit (ITC), currently at 30% through 2026. This federal tax credit applies to the total system cost including equipment, installation, and permitting. Businesses can also claim MACRS depreciation, recovering system costs over 5 years for tax purposes.
Power Purchase Agreements (PPAs)
A PPA allows you to host solar panels on your property while a third party owns and maintains the system. You purchase electricity generated at a predetermined rate, typically 10-30% below utility prices. PPAs require no upfront investment and include all maintenance.
PPA agreements typically run 15-25 years. At contract end, you may purchase the system at fair market value, have it removed, or renew the agreement. While PPAs offer immediate savings without capital expenditure, total lifetime savings are lower than direct ownership.
Forum discussions reveal that many business owners initially prefer PPAs for simplicity. However, those with available capital often regret not purchasing systems directly after learning the total cost difference over 20+ years.
PACE Financing for Property Owners
Property Assessed Clean Energy (PACE) financing attaches solar system payments to your property tax bill. This innovative financing requires no upfront payment and offers competitive interest rates. Repayment terms extend up to 25 years, matching system lifespan.
PACE financing transfers with property sale, removing concerns about recouping solar investments if you sell. However, PACE availability varies significantly by state and municipality. Check local program availability before depending on this option.
Tax Incentives and Depreciation Benefits
The federal Investment Tax Credit delivers 30% of your total system cost as a tax credit through 2026. This percentage steps down in future years, making immediate installation financially advantageous. Combine the ITC with MACRS accelerated depreciation for substantial first-year tax benefits.
Many states offer additional incentives including rebates, grants, and performance-based incentives. Research your state’s specific programs through the Database of State Incentives for Renewables and Efficiency. Some utilities also offer commercial solar rebates or performance payments.
How to Install Solar Panels on a Commercial Building: Step-by-Step Process
Now we reach the core of how to install solar panels on a commercial building. The actual installation typically spans 1-3 months depending on system size and complexity. I will break this down into eight clear phases.
Step 1: Finalize System Design and Engineering
Your solar contractor completes detailed electrical and structural engineering plans. These stamped drawings specify equipment placement, electrical configurations, and mounting details. The engineering phase ensures your system meets local building codes and utility requirements.
Expect 2-4 weeks for complete engineering documentation. Complex commercial installations or challenging roof conditions may extend this timeline. Review all drawings carefully before approving. Changes become exponentially more expensive once installation begins.
Step 2: Secure Permits and Approvals
Your contractor submits permit applications to local authorities and interconnection requests to your utility company. Building permits address structural and safety compliance. Electrical permits cover system wiring and grid connection.
Permit timelines vary dramatically by jurisdiction. Some municipalities approve commercial solar permits in days. Others require multiple review cycles extending 6-10 weeks. Ask your contractor about typical timelines in your specific location.
Utility interconnection applications require detailed system specifications and single-line electrical diagrams. The utility reviews these for grid safety and may require additional equipment such as external disconnect switches or specific inverter certifications.
Step 3: Order Equipment and Schedule Installation
Once permits are approved, your contractor orders solar panels, inverters, racking systems, and electrical components. Equipment delivery typically takes 4-8 weeks depending on supply chain conditions. Premium panel manufacturers may have longer lead times.
Schedule installation during periods of favorable weather and minimal business disruption. Many commercial installations occur during facility shutdowns or low-activity periods. Coordinate with your operations team to minimize impact on daily activities.
Step 4: Prepare the Installation Site
The installation crew prepares your roof or ground-mount location. This includes staging materials, setting up safety equipment, and establishing electrical connection points. For rooftop installations, crews install guardrails and safety anchors per OSHA requirements.
If your roof requires repairs or reinforcement, complete this work before solar installation begins. Your contractor should verify roof readiness before the main crew arrives. Delays from discovering roof issues mid-project create significant schedule and cost overruns.
Step 5: Install Mounting System
The crew installs racking systems that hold solar panels in position. Ballasted systems position concrete blocks or specialized ballast materials on the roof membrane. Penetrating systems anchor to structural members with proper flashing and sealing.
Mounting installation requires precision. Racking must support panels at optimal angles while withstanding wind loads, snow loads, and thermal expansion. Experienced commercial installers work efficiently while maintaining quality standards.
Step 6: Mount Solar Panels
Panels arrive on-site and crews begin systematic installation. Commercial panels typically measure approximately 3.5 x 6.5 feet and weigh 40-50 pounds each. Crews of 3-4 workers position and secure panels to the racking system.
Panel installation progresses rapidly once racking is complete. A skilled crew can install 50-100 panels per day depending on roof access and layout complexity. The installation team verifies electrical connections between panels as they work.
Step 7: Install Electrical Components and Inverters
Electricians run conduit from panel arrays to inverter locations, then to your main electrical service. Inverters convert DC electricity from panels into AC power compatible with your building’s electrical system and the utility grid.
Commercial installations often use string inverters housed in dedicated electrical rooms or weatherproof enclosures. The electrical team installs disconnect switches, monitoring equipment, and production meters. All electrical work must comply with NEC standards and local amendments.
Step 8: Connect to Grid and Commission System
The final installation phase connects your system to the utility grid. This requires coordination with your utility company and typically involves installing a bidirectional meter that tracks both energy consumption and solar production.
System commissioning includes testing all electrical connections, verifying inverter operation, and confirming monitoring systems function properly. Your contractor should provide documentation of all test results and commissioning reports for your records.
Understanding Commercial Solar Permits and the 120 Rule
What is the 120 rule for solar panels? This NEC (National Electrical Code) requirement states that the sum of circuit breaker ratings supplying power to a busbar cannot exceed 120% of the busbar rating. For solar interconnection, this limits how much solar capacity you can add without upgrading electrical service equipment.
This rule matters because solar panels feed electricity back into your electrical system. The combined capacity of your utility connection plus solar generation cannot exceed 120% of your panel’s busbar rating. Exceeding this requires service upgrades or supply-side connections.
Building and Electrical Permits
Commercial solar installations require building permits addressing structural loads and fire safety. Your contractor submits engineering drawings showing panel layout, attachment methods, and structural calculations. Fire departments review plans for access pathways and rapid shutdown compliance.
Electrical permits cover all wiring, inverter installation, and grid connection work. Licensed electricians must perform or supervise all electrical work. Inspections occur at rough-in completion and final system activation.
Interconnection Agreements
Your utility company requires an interconnection agreement before solar activation. This legal contract establishes terms for grid connection, net metering arrangements, and safety requirements. Review interconnection fees, which vary widely between utilities.
Net metering programs credit you for excess solar electricity sent to the grid. These credits offset electricity drawn at night or during low-production periods. Understand your utility’s specific net metering rules, as some states have modified or eliminated traditional net metering.
What Happens After Commercial Solar Panel Installation
Installation completion marks the beginning of your solar system’s 25-30 year operational life. The post-installation phase includes inspections, utility approval, monitoring setup, and establishing maintenance protocols.
Inspections and Permission to Operate
Local authorities conduct final inspections verifying code compliance and installation quality. Electrical inspectors verify proper wiring, grounding, and safety equipment. Building inspectors confirm structural integrity and fire safety measures.
After passing inspections, your utility conducts its own interconnection inspection. They verify proper meter installation, safety disconnects, and compliance with interconnection requirements. Upon approval, the utility issues Permission to Operate (PTO), authorizing system activation.
The period between installation completion and PTO issuance frustrates many business owners. Based on forum discussions and my experience, this typically takes 2-6 weeks depending on utility workload and inspection scheduling. Plan operations accordingly during this waiting period.
Performance Monitoring Setup
Modern commercial solar systems include comprehensive monitoring platforms. These systems track real-time energy production, identify performance issues, and generate production reports. Most monitoring works through internet-connected devices that send data to cloud-based dashboards.
Configure monitoring alerts for production drops or equipment faults. Early detection of issues prevents significant energy losses. Many systems also track financial metrics showing cumulative savings and environmental impact metrics like carbon offset.
Maintenance Requirements
Commercial solar systems require minimal maintenance but benefit from regular attention. Panel cleaning improves performance, especially in dusty or high-pollen environments. Annual inspections catch potential issues before they cause significant problems.
Inverter maintenance may be required based on manufacturer specifications. String inverters typically need replacement once during system lifetime. Monitoring systems alert you to inverter failures requiring immediate attention.
Establish a maintenance schedule with your installer or a qualified solar service company. Many contractors offer maintenance agreements covering annual inspections, panel cleaning, and emergency service calls. Budget approximately 0.5-1% of system cost annually for maintenance.
Warranty Coverage
Understand your warranty protections before issues arise. Solar panels typically carry 25-year performance warranties and 10-12 year product warranties. Inverters usually have 5-12 year warranties with available extensions. Installation workmanship warranties range from 5-10 years.
Document all warranty terms and registration requirements. Some warranties require online registration within specific timeframes. Keep all purchase documentation, contracts, and warranty certificates organized for future reference.
Frequently Asked Questions About Commercial Solar Installation
Can you put solar panels on a commercial building?
Yes, most commercial buildings can support solar panel installations. Requirements include adequate roof space or ground area, structural capacity to handle additional weight (3-6 pounds per square foot), suitable electrical infrastructure, and minimal shading. Flat commercial roofs work excellently with ballasted or penetrating mounting systems. Ground-mounted systems are an alternative for properties with available land.
How much does it cost to install solar panels on a commercial building?
Commercial solar installations typically cost $1.50 to $3.00 per watt depending on system size, equipment quality, roof complexity, and local labor rates. A 100kW system ranges from $150,000 to $300,000 before incentives. The federal Investment Tax Credit reduces costs by 30%, and MACRS depreciation provides additional tax benefits. Financing options including loans, leases, and PPAs can eliminate upfront costs.
How long does commercial solar installation take?
From contract signing to system activation, commercial solar projects typically take 6-12 months. The timeline breaks down as follows: site assessment and design (2-4 weeks), permitting and approvals (4-10 weeks), equipment procurement (4-8 weeks), physical installation (2-8 weeks depending on system size), inspections and utility interconnection (2-6 weeks). Complex projects or jurisdictions with slow permitting may extend beyond 12 months.
What is the 33% rule in solar panels?
The 33% rule is a guideline recommending that solar array capacity should not exceed 33% of a building’s total electrical service capacity. For example, if your building has a 1000 amp electrical service, your solar system should not exceed approximately 333 amps of capacity. Exceeding this ratio may trigger additional utility requirements, equipment upgrades, or more complex interconnection agreements.
What is the 120 rule for solar panels?
The 120 rule is a National Electrical Code (NEC) requirement stating that the sum of circuit breaker ratings supplying power to a busbar cannot exceed 120% of the busbar rating. For solar installations, this limits how much solar capacity can be added to existing electrical panels without requiring service upgrades. The rule prevents overloading electrical busbars with combined utility and solar generation capacity.
Should I hire professionals or consider DIY commercial solar installation?
Commercial solar installations should always use professional, certified installers. Unlike residential systems, commercial projects involve complex electrical work requiring licensed electricians, structural engineering stamps, utility interconnection agreements, and extensive permitting. NABCEP certification indicates qualified installers. DIY installation risks code violations, safety hazards, voided warranties, utility rejection, and significant liability exposure for businesses.
What is the typical ROI and payback period for commercial solar?
Commercial solar systems typically deliver ROI of 15-25% annually with payback periods of 4-7 years. Actual returns depend on electricity rates, system size, financing method, and available incentives. Direct purchase with ITC and depreciation claims delivers fastest payback. After payback, systems provide 20+ years of nearly free electricity. PPAs and leases offer immediate savings but lower lifetime returns compared to ownership.
How do I choose a qualified commercial solar installer?
Look for NABCEP-certified installers with specific commercial project experience. Request references from similar commercial installations and verify proper licensing and insurance coverage. Evaluate their proposal quality, engineering capabilities, and warranty terms. Check industry association memberships (SEIA) and manufacturer certifications. Quality installers conduct thorough site assessments, provide detailed financial projections, and explain permitting processes clearly. Avoid installers who pressure for immediate decisions or provide vague timelines.
Conclusion
Learning how to install solar panels on a commercial building positions your business for decades of energy independence and cost savings. The process requires careful planning, qualified professional installation, and patience through permitting timelines. However, the financial and environmental returns justify the effort.
Start with a thorough feasibility assessment evaluating your roof condition, electrical infrastructure, and energy needs. Compare financing options to determine whether direct purchase, loans, PPAs, or leases best serve your business goals. Select NABCEP-certified installers with proven commercial experience and transparent processes.
Your commercial solar installation will reduce operating costs by 20-50% while advancing sustainability goals. With 30% federal tax credits available through 2026, now is the ideal time to begin your solar journey. Take the first step by scheduling site assessments with multiple qualified installers to understand your specific opportunities.